Disclaimer: Links on this page pointing to Amazon, eBay and other sites may include affiliate code. If you click them and make a purchase, we may earn a small commission.

Timcook8

Newbie
Joined
May 22, 2024
Messages
12
Reaction score
15
Location
Nampa Idaho
The top mount bushing,will be a custom offset poly bushing,i will see if i can get a few made if anyone else want's to do this swap

Driver's lower mount will be drilling a hole in center,completely removing the stock mount.then making a stock bracket (unless someone has oem part #) to have it bolt in. (pic for reference)


driveshaft info,if you have this driveshaft it will work without mods,take the clip that holds it off,take off the endcap now you can get move it around enough and use a pry bar to get it in,then put the cap and clip back on
I have questions.....Nice ride, sounds like the setup that I am building.
 

Attachments

  • 256737143_400664641848739_5267650127292088607_n.jpg
    256737143_400664641848739_5267650127292088607_n.jpg
    365.6 KB · Views: 8

offroadtahoe

I'm Awesome
Joined
Jul 23, 2021
Messages
182
Reaction score
186
Location
Houston,TX
Update* Going to put as much detail in one thread on every difference as I can
I will refer to the 3 different 9.25 case type's as they are all identifiable by the aluminum casing and by the diff tube
*Thermal actuated
*Electric actuated
*Duramax casing


https://www.gmt400.com/threads/gmt800-9-25-ifs-axle-only-swap.63081/#post-1359536 Here is a thread with detailed pic's on the Duramax aluminum casing.And the electric actuated casing difference's you can use the Duramax casing with gmt400 tube and this will make the strongest diff. (there is another even stronger aftermarket) Dynatrac ProRock XD60 IFS Differential
idk how you would mount that thing


I have both the thermal and electric actuated diff's and at a later time will add photo's of the differences of the aluminum case reinforcement.

Driver side diff mount bushing's are different on the diff from thermal actuated to electric actuated and the bottom can be upgraded (the top can not be since we have to make an offset bushing confirmed this will work just need to make one) the thermal actuated has just a sleeve,and the electric actuated version has two washer's with indention's

The electric actuator tube might be heat treated and would be stronger

The only difference between thermal actuated and electric actuated tube's is The length of the tube ( see pics ) You have to run a spacer in the thermal actuator tube to upgrade to electric actuator.

If you have a thermal tube and thermal harness and want to upgrade buy the thermal to electric conversion harness and the spacer comes with it. Dorman 600-600 harness and Dorman 600-101 actuator

If you downgrade and put thermal tube diff in a truck that came with electric use a 10mm socket in the actuator housing

You can use a hummer h2 awd passenger axle to delete the actuator (see pic below)

There is also a cable driven posi-lock actuator get the right version one is for 8.25 Part No. 600 the other is for 9.25 #Part No. 800 These seem to be for thermal tube only I don't see why they counldn't work for electric

Stock 9.25 cv's should bolt in without mod's then if 0-3" lifted.
It might be hard to get them in (might have to undo upper ball joint to get them in) but they will fit. with stock crank they will bolt in easy (see below)

for 6" bracket drop lift kit's. (I tested as you crank and the lower control arm goes down the cv axle flange goes in more towards the diff) on a 0-3" lift this fine.

But this is why you have to shorten the cv's on 6" bracket drop kits since they are actually 4" lift kits with 2" crank for the 6" vs no shortening for knuckle kit's since they actually drop the diff the 6"
 

Attachments

  • electric actuated.jpg
    electric actuated.jpg
    245 KB · Views: 11
  • h2 axle actuator delete.png
    h2 axle actuator delete.png
    1.9 MB · Views: 11
  • thermal actuated with electric upgrade.jpg
    thermal actuated with electric upgrade.jpg
    279.3 KB · Views: 11
  • passenger diff mount (less angle and height then duramax).jpg
    passenger diff mount (less angle and height then duramax).jpg
    147.4 KB · Views: 11

offroadtahoe

I'm Awesome
Joined
Jul 23, 2021
Messages
182
Reaction score
186
Location
Houston,TX
*used to be on real lift's site

IFS SURVIVAL: PRETTY BASIC REALLY!


Is IFS as strong as a comparable straight axle in overall axle torque rating?

Yes. The biggest reason for IFS failure is lift kit manufacturer insufficiencies in testing and trail use before the
lift kits are released to the public! Many Manufacturers drop the front diff inappropriately creating increased
CV angles at their claimed lift gain, leaving the cv's at their greatest operating angle with the wheels straight. If
the steering is turned a little, the outer cv's are beyond their operating angle, and disaster is at the next turn!

Can IFS handle more high speed abuse and jumping than a straight axle?

Yes. This is common knowledge in the off road world that when it comes to speed and suspension abuse IFS is
king! It's pretty straight forward when you think about your suspension moving over bumps! On an IFS truck the
largest amount of weight changing direction is your front tires. On a straight axle, most of the weight cycling up
and down is the entire front axle, so this weight moving rapidly under the vehicle creates extreme harshness
making the vehicle uncontrollable at higher speeds. In many cases a 1 ton front axle with large tires may weigh
more than the frame and chassis, so you know who's gonna win the smoothness battle here!! Not the Chassis,
but the front axle!! This will take a toll on electrical wiring, radiators, hoses etc. Lets say this is an example of
50/50 weight ratio. Most IFS weight Ratios are more like 95/5. Pretty easy to see why IFS rules here! It also
goes to reason that if you put a 1 ton straight axle under a small vehicle it is alot more dangerous at speed!

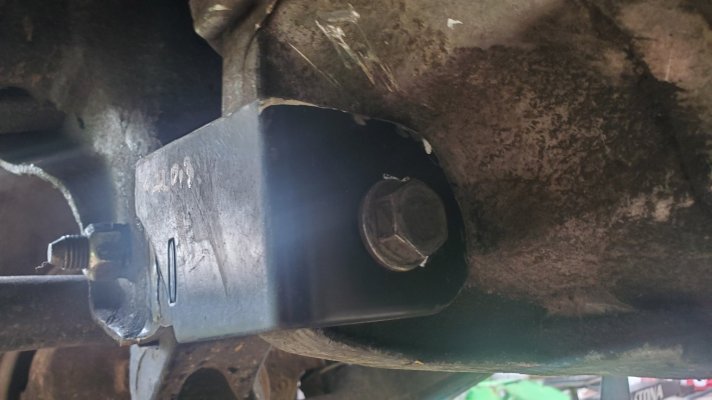
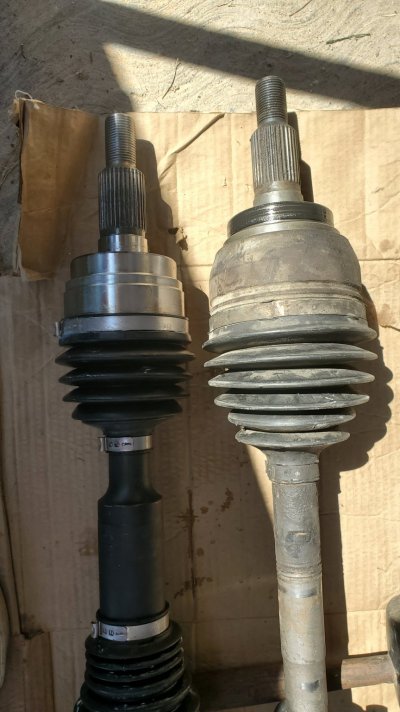
Do Some IFS lift kit manufacturers, cheat by not lowering the front diff. Adequately?

Absolutely! Don't want to mention any names, but many lift kits that claim 6" of lift only lower the front diff
3.75"s! This increases your CV angle 2.25"s. Basically the only safe amount of lift would be ~ 4"s on these
particular kits. When a truck is lifted, normally larger tires are going under it, so not lowering the front diff to
OEM specs is a ticking time bomb for the CV's and front diff!

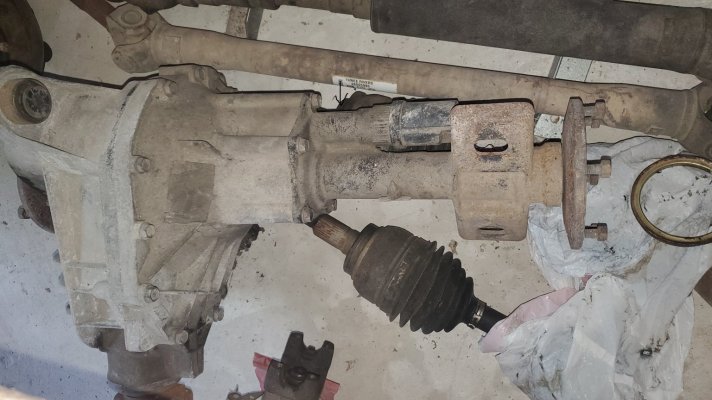
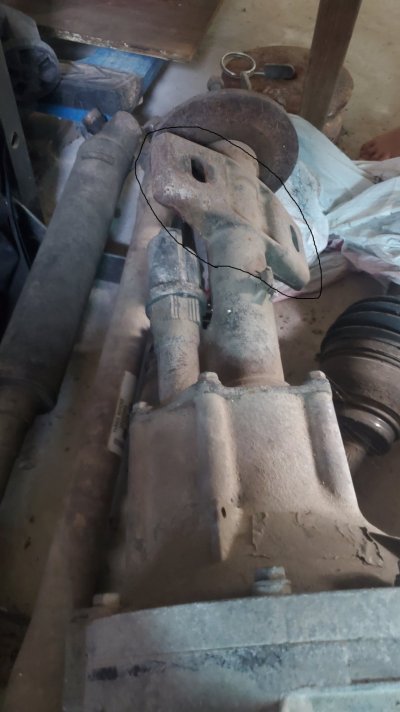
Is the 1/2 ton GM/AAM 8.25 diff just to weak to be a contender with SAS (Dana 44)?

Yes, we have found this to be true!! For whatever reason the AAM 8.25" by weight and size ratio is very
insufficient when compared to the AAM 7.25" that is under the S-10's, or the 9.25" under the 8 lug 2500-3500
trucks! We have found that the 8.25" is only capable of handling only 7% more axle torque than the AAM
7.25", and can handle only 63% of the axle torque that the AAM 9.25" can!! (Realift testing) Maybe gas
mileage and efficiency won when it came to the 1/2 tons! If you have a 1/2 ton get the 9.25" in it or be careful!!
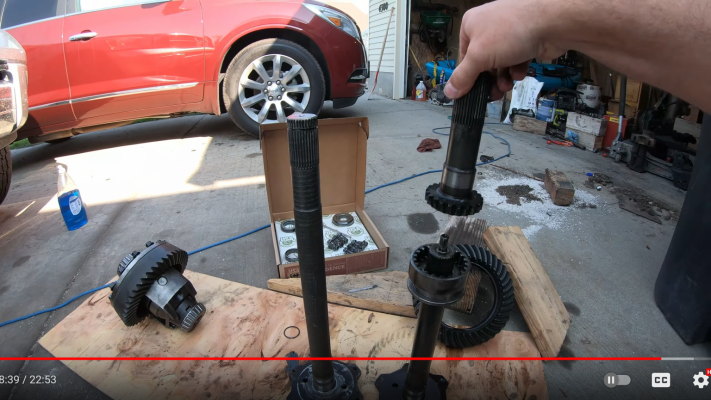
Without a locker available we performed all testing on the 8.25" with it spooled. We found that the cases
surprisingly survived much better when locked than with open diffs. The side pinion gears acted like a wedge's
stretching/spreading the 3rd members making the aluminum case more prone to breakage! Aluminum cases
do not hold up well to the shock loads of an open diff or unlocked 3rd member when severe differentiating
occurs! We would recommend to always have the differential locked when putting extreme loads on the AAM
Series ICA's

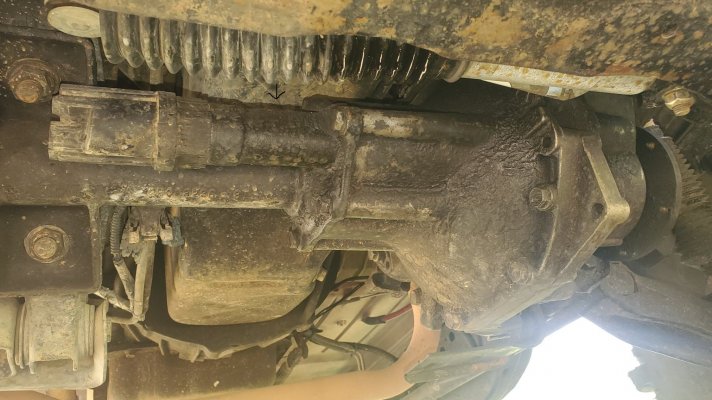
Is the AAM 9.25 diff as strong as a 99-08 3500 1 ton Dodge truck in terms of axle torque?

Yes, with a good lift kit that is installed correctly this statement has been proven! As it turns out they are
basically the same axle, 1 is an I.C.A. (Independent Carrier assembly) and 1 is SAS (Solid axle suspension)
These axle's both share most of the same 33 spline axle parts.

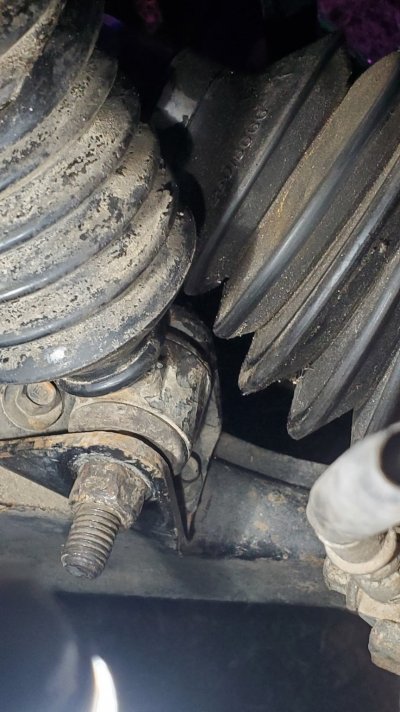
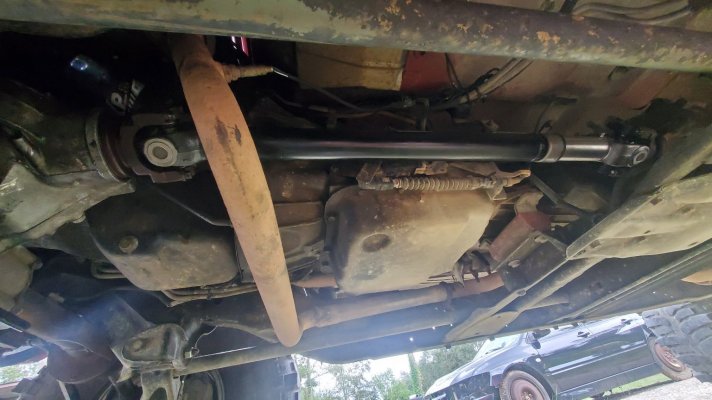
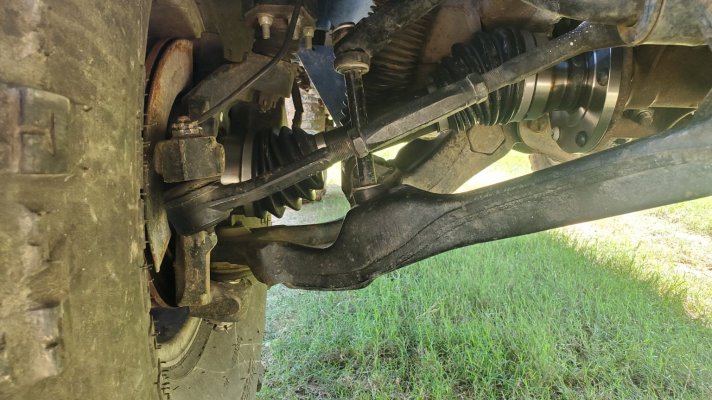
Is it's OK to crank up the torsion bars to get fender clearance to prevent tire rub?

Never, this is the silliest thing that an individual can do to their truck. Here's why!! When you crank the torsion
bars you didn't just raise the truck you weakened your CV strength and steering strength. The reason it is
harder on the cv's and the steering isn't just from the extra angle, but more from the increased load on
your tire at any given angle of the suspension cycle, which means more traction and load at the more
dangerous angle. At the oem operating angles the suspension supports the entire weight at this given angle,
and the cv's and steering system can handle tons of abuse because the load on the cv and steering
decreases as the wheel extends. For Example: If the wheels are all the way drooped/extended in OEM form,
there may only be 250-300 lbs of load on the tire so it's nearly impossible to put a tremendous amount of strain
on the cv's or steering because the suspension loading is too soft. Crank the torsion bars up and now you may
have up to 1,000 lbs of load on the tire with the wheel drooped/extended. Potentially 4 times more force with
the cv's and steering angles at there most vulnerable point.

What about the Red sled in Peterson's? What happened here?

The red sled for starters used the weakest 9.25" front diff of all G.M. trucks the 88-96! The 97-08 are much
better. Lots of extra reinforcement has been added to the aluminum cases and better axle heat treating
processes. The red sled was obviously an example of many things stated above! The front diff was not
centered, this is terrible, because the cv's will both work incorrectly. 1 side bottoming in the tripod joint and the
other trying to pop out of the tripod joint. This is hard on everything. You cannot break 2-3 cv shafts and
expect not to do some damage to the (ICA), which ultimately happened. I have never broken or seen any 9.25"
cases break the way the red sled case broke. (1) I have a feeling that the drivers side case half had worn
bushings therefore making the passenger side half handle most of the torque. (2) The drivers side cv shafts
bottoming on the tripod joint put to much side force on the right hand case, and (3) I also think the 3rd member
support bearings may have been to tight also. (4) When the case broke the front locker was not engaged,
which would make it more prone to break a case.
It may not make sense to an old time SAS guy, but it's true! So basically they proved all of our historical
facts in just a few articles and a few issues, just not how to fix them! I think it's sad that they stopped
prematurely on the sled. 1-2 more article's and they may have really turned some heads!

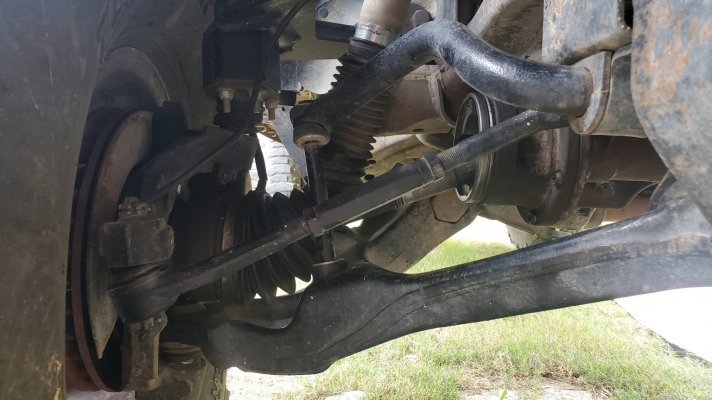
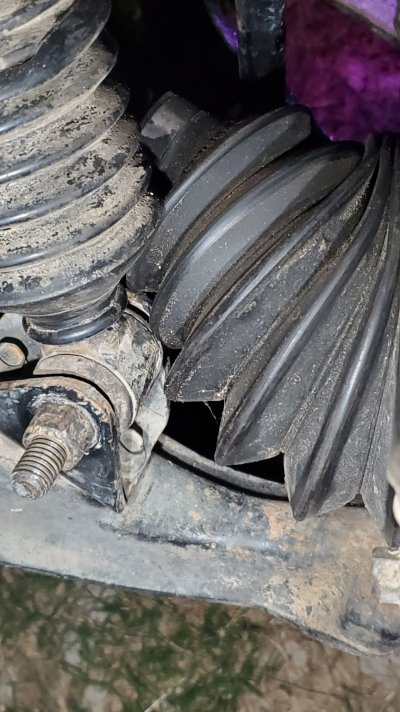
Would the installation of a front locker just destroy IFS front cv axles?

No, on an IFS setup the locker actually helps it survive, mostly because the wheel with the most traction
happens to be the wheel with the better cv and steering angles. It also reduces the force at the extended wheel
dramatically since the wheel with the most traction is the one most apt to do it's job. Normally with an open diff
the wheel that is extended or drooped takes all the axle torque which is exactly what you don't want.

I hope this has alleviated a lot of the war on IFS/SAS.

If your truck is set-up correctly breakage should only occur on the cv axle shaft or tripod joint, although these
failures can ultimately destroy a case half. We have broken alot of stuff over the last 7yrs. During the first 3
years of this testing we destroyed countless #'s of cv axles, cases, driven axles and steering components with
just minor to moderate wheeling! Since we have learned all of the things stated above this is what we have
broken in 4 more years of Severe Rock Crawling:
7.25" with 35" tires (3 S-10 cv axle shafts, 1 Tripod joint, 1 Aluminum Case while reversing)
8.25" with 35" tires (7 1/2 ton cv axle shafts, 2 LH stub shafts, 2 Cases broken from tripod joint interferences
and broken stub shaft interferences)
9.25" with 37" tires (Nothing after our most severe testing yet) Just for the heck of it we delivered full throttle
power to just 1 front axle the drivers side then the passenger side with a 1993 200 HP 4.3 litre in low range in
1st gear equipped with 4.88 gears and no breakage occurred! The 7.25 failure occurs at about .25 throttle the
8.25" Failed just under 1/2 throttle!
 

offroadtahoe

I'm Awesome
Joined
Jul 23, 2021
Messages
182
Reaction score
186
Location
Houston,TX
This guy made a video of the swap

key differences he used spacer's on the passenger A-arm so you wound not have to grind a little bit off the frame like in my photos.BUT this would definitely require you to mod the lower mount and drop it 1-2" like he said if not it won't bolt in and if it did it would not be aligned

and would also slightly change the location of the slotting the upper mount like he did in the video

Timcook8 also suggested removing the k1500 motor mount/upper diff mount and cutting and welding in a k3500 mount

multiple solutions to the top mount issue the offset bushing idea would most likely be the worst long term solution since it would only have a tiny bit of bushing and has to be custom made.


xc_hide_links_from_guests_guests_error_hide_media
 

offroadtahoe

I'm Awesome
Joined
Jul 23, 2021
Messages
182
Reaction score
186
Location
Houston,TX
(This swap is alot of work) Can confirm slotting the top mount fits great I recommend using the newer style driver side bushings that have washers.

you need to have done #2 and #3 #5 is revised socket head caps will not work passenger side you need button head bolt's

To install you need to get the lower driver mount bolt in,Then the passenger bolts in then.Tighten driver side lower,Then the passenger side.Now the top mount is in position for the bolt.

Since it's extremely hard to dremel the stock driver side lower diff mount off without damaging it.you need one fabricated see next post for where to drill a 9/16 hole and then remove it and get one replicated.

That's it
 
Last edited:

offroadtahoe

I'm Awesome
Joined
Jul 23, 2021
Messages
182
Reaction score
186
Location
Houston,TX
Diff is mounted.test fitting 9.25 cv's and ran into a issue with the forged control arms.likely won't be a issue for most and not sure if it matter's on the stamped lower control arms since the shock mount is in a slightly different location.Im running a 2" ball joint spacer this allows the lower control arm to go down lower since it doesn't stop on the upper bump stop.

can grind into it to add some clearance.make a custom low profile mount.get extended travel cv's boots looks slimmer and the housing looks like it is too better angles might help

rcv cv's look like they would have the best clearance

i know for sure stock height this isnt a issue.have not confirmed if 2" or so is the same
 

Attachments

  • 20240903_173623.jpg
    20240903_173623.jpg
    230.8 KB · Views: 7
  • 20240902_205534.jpg
    20240902_205534.jpg
    234.3 KB · Views: 6
  • 20240902_205429.jpg
    20240902_205429.jpg
    270.7 KB · Views: 7
Last edited:

offroadtahoe

I'm Awesome
Joined
Jul 23, 2021
Messages
182
Reaction score
186
Location
Houston,TX
Lmk If you want a bracket made
 

Attachments

  • 20240907_183529.jpg
    20240907_183529.jpg
    159.9 KB · Views: 5
  • 20240907_183559.jpg
    20240907_183559.jpg
    203.9 KB · Views: 5
  • 20240903_173553.jpg
    20240903_173553.jpg
    221 KB · Views: 5

offroadtahoe

I'm Awesome
Joined
Jul 23, 2021
Messages
182
Reaction score
186
Location
Houston,TX
ok so extended cv's made it easy to solve the problem, make sure you get FVP GM8002XTT from rockauto photos they have the best clearance on boots if your in the houston area dm me if you want this swap done.


they also get rid of the bind ever 1/3 rotation of the tire that makes the upper balljoint move back and forth

This is with full turn full drop no endlink in clearance
 

Attachments

  • 20240908_145431.jpg
    20240908_145431.jpg
    257.9 KB · Views: 6
  • 20240908_145446.jpg
    20240908_145446.jpg
    225.7 KB · Views: 6
  • 20240908_152754.jpg
    20240908_152754.jpg
    243.1 KB · Views: 5
  • 20240908_155126.jpg
    20240908_155126.jpg
    319.5 KB · Views: 5
Last edited:
Top