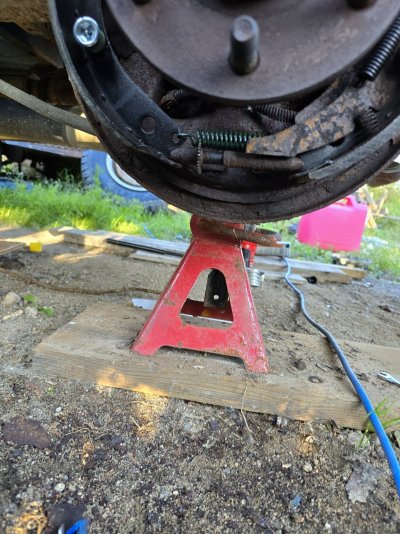
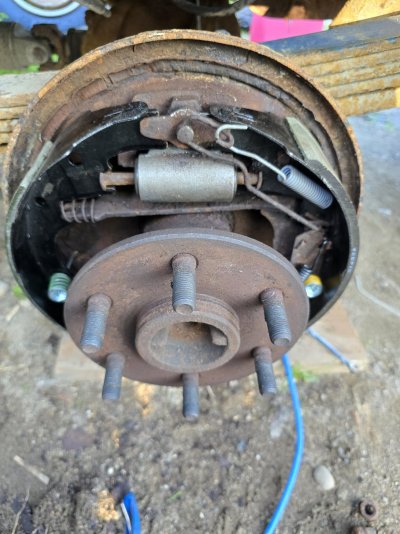
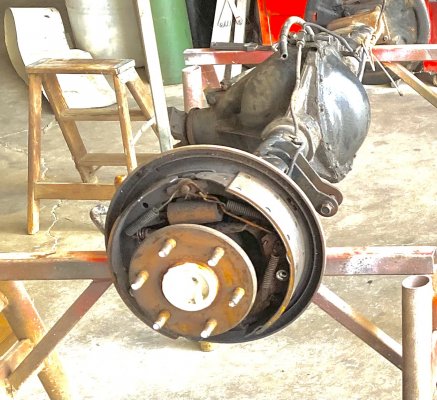
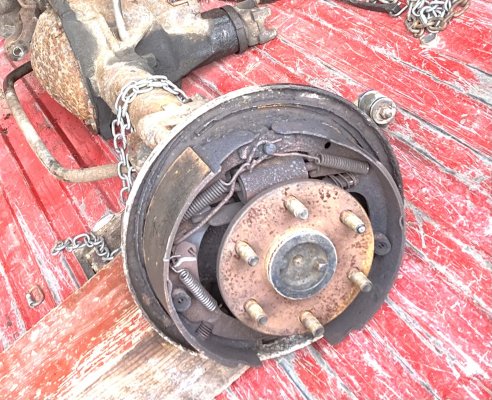
Having a time with drum brakes

Disclaimer: Links on this page pointing to Amazon, eBay and other sites may include affiliate code. If you click them and make a purchase, we may earn a small commission.

zodiac572

Newbie
Joined
Aug 5, 2024
Messages
26
Reaction score
22
Location
Cochrane
Hello everyone, need some opinions as it seems the new springs are made a bit different then the old worn out ones , seems the brakes still have some play in them and arent sitting right
 

Attachments

  • 20240828_184532.jpg
    20240828_184532.jpg
    430.5 KB · Views: 26
  • 20240828_184525.jpg
    20240828_184525.jpg
    313.3 KB · Views: 25

GoToGuy

I'm Awesome
Joined
Sep 16, 2020
Messages
3,999
Reaction score
5,029
Location
CAL
Uh..are both sides like this? Did you disassemble both? And you didn't take a couple photos before this goat rope?
1. The star wheel adjuster has to be stroked by the arm on other side to function.
2. The springs are in wrong positions.
3. All future work , work smarter, take photos , more the
merrier. It's 4 seconds that will save you hours of grief.
Let me find a picture.....
 

GoToGuy

I'm Awesome
Joined
Sep 16, 2020
Messages
3,999
Reaction score
5,029
Location
CAL
Number 8 goes over the center pin top to retain the wing against the shies., recheck your assembly # 14
You must be registered for see images attach
 

Schurkey

Supporting Member
Supporting Member
Joined
Jan 14, 2018
Messages
12,617
Reaction score
16,432
Location
The Seasonally Frozen Wastelands
You must be registered for see images attach

As said...star wheel goes to the rear, so the lever arm can turn it.

You must be registered for see images attach

SOMETHING is preventing the shoes from touching the anchor pin at the top. Jammed against the backing plate, stuck on the park-brake spreader-bar...whatever it is, it's gotta be slapped into place so the tops of the shoes touch the anchor pin.

I suspect the spring that is too long in the photo...goes on the front shoe.
 

termite

Definitely NOT Awesome
Joined
Feb 18, 2018
Messages
1,455
Reaction score
3,643
Location
wv
SOMETHING is preventing the shoes from touching the anchor pin at the top.
Looks like the parking brake strut (#6 in drawing above), located below the wheel cylinder isn't seated properly on the front shoe.
I suspect the spring that is too long in the photo...goes on the front shoe
+1 vote for this based on a rusty memory.
 

1998_K1500_Sub

Nitro Junkie
Supporting Member
Joined
Jan 28, 2019
Messages
2,888
Reaction score
4,514
Location
Rural Illinois
Here’s how they’re supposed to be assembled…. Left and right PICTURED BELOW.

Note difference in the primary (front) and secondary (rear) shoes.

Note the spring sizes and locations.

Sorry, the adjuster starwheel is not visible in either picture.

The starwheels are DIFFERENT left and right, so don’t mix them up (one side uses right-hand thread, the other used left-hand thread). This is required so that when the starwheel is rotated by the adjustment pawl, it will cause the shoes to spread.

The spring that STRADDLES the starwheel should not be TOUCHING the starwheel (as the one in your picture does), as it will interfere with proper operation.
 

Attachments

  • IMG_9217.jpeg
    IMG_9217.jpeg
    527 KB · Views: 24
  • 74286621048__050DF60B-AAF2-4D56-B021-7607FAE351CA.jpeg
    74286621048__050DF60B-AAF2-4D56-B021-7607FAE351CA.jpeg
    753.7 KB · Views: 12
Last edited:

Schurkey

Supporting Member
Supporting Member
Joined
Jan 14, 2018
Messages
12,617
Reaction score
16,432
Location
The Seasonally Frozen Wastelands
^^^ Note that that's the opposite side from the original pictures--so the primary and secondary shoes are reversed.

Primary shoe = Shorter. Often lighter-colored, thicker, softer or some combination of those characteristics. Goes FORWARD.

Secondary shoe = Longer. Often darker-colored, thinner, harder or some combination. Goes to the REAR.
 

GoToGuy

I'm Awesome
Joined
Sep 16, 2020
Messages
3,999
Reaction score
5,029
Location
CAL
Did you figure it out? You had 7 mistakes. Brakes are more important than anything else, unless your on fire, then that's important. But if can't stop , your hosed. And then whoever or whatever stops you is screwed or dead. Don't take shortcuts with brakes.
Use the manual, take pictures , draw pictures, if your not sure , work smarter, not harder.
 

1998_K1500_Sub

Nitro Junkie
Supporting Member
Joined
Jan 28, 2019
Messages
2,888
Reaction score
4,514
Location
Rural Illinois
Probably the take-away lesson for OP or any other readers is to disassemble and reassemble only one side at a time(!). Thus, when in doubt during reassembly, simply look to the opposite side for guidance.

Also, check the starwheel adjusters for ease of operation. Once removed (e.g., during brake disassembly) they should rotate freely and easily. If not, disassemble them, clean, lubricate and reassemble, or replace with new.
 

zodiac572

Newbie
Joined
Aug 5, 2024
Messages
26
Reaction score
22
Location
Cochrane
Probably the take-away lesson for OP or any other readers is to disassemble and reassemble only one side at a time(!). Thus, when in doubt during reassembly, simply look to the opposite side for guidance.

Also, check the starwheel adjusters for ease of operation. Once removed (e.g., during brake disassembly) they should rotate freely and easily. If not, disassemble them, clean, lubricate and reassemble, or replace with new.
Draw back here is the rear brakes never worked from get go as previous owner cut the lines to save money and messed up the springs , hence even when i kept one side assembled there was no way i could have reassembled it
 
Top